READ ALL INSTRUCTIONS THOROUGHLY FROM START TO FINISH BEFORE BEGINNING INSTALLATION. USE THE PROPER JACKING LOCATIONS. DEATH OR SERIOUS INJURY CAN RESULT IF INSTRUCTIONS ARE NOT CORRECTLY FOLLOWED.
THE USER UNDERSTANDS AND RECOGNIZES THAT SUSPENSION PARTS, SPECIALIZED SUSPENSION EQUIPMENT, AND ALL PARTS AND SERVICES SOLD BY LSDELOREANSTORE (SICA LLC) ARE EXPOSED TO MANY AND VARIED CONDITIONS DUE TO THE MANNER IN WHICH THEY ARE INSTALLED AND USED. LSDELOREANSTORE (SICA LLC) SHALL BEAR NO LIABILITY FOR ANY LOSS, DAMAGE OR INJURY, EITHER TO A PERSON OR TO PROPERTY, RESULTING FROM THE INSTALLATION, DIRECT OR INDIRECT USE OF ANY LSDELOREANSTORE (SICA LLC) PRODUCTS OR INABILITY BY THE BUYER TO DETERMINE PROPER USE OR APPLICATION OF LSDELOREANSTORE (SICA LLC) PRODUCTS. LSDELOREANSTORE (SICA LLC) SHALL NOT BE LIABLE FOR ANY CLAIMS, DEMANDS, INJURIES, DAMAGES, ACTIONS, OR CAUSES OF ACTION WHATSOEVER TO BUYER ARISING OUT OF OR CONNECTED WITH THE USE OF ANY LSDELOREANSTORE (SICA LLC) PRODUCTS. MOTORSPORTS ARE DANGEROUS; AS SUCH, NO WARRANTY OR REPRESENTATION IS MADE AS TO THE PRODUCT’S ABILITY TO PROTECT THE USER FROM INJURY OR DEATH. THE USER ASSUMES THAT RISK!
PRE-INSTALLATION NOTES
1. A front end alignment should be performed by a qualified alignment shop after any changes to the suspension system have been made.
2. This manual does not cover disassembly of your OEM suspension
3. Do not lubricate or grease the LCA thru bolt or components unless absolutely necessary. Refrain from getting lubricant on the contact faces of the bushings and spacers
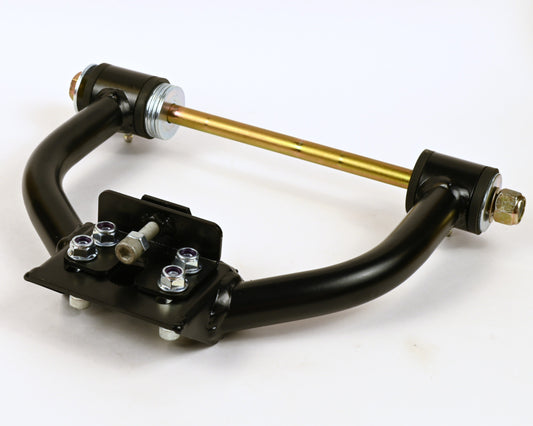
NOTABLE PARTS FOR INSTALL(per arm):![]()
1x Anti-Rotation spacer
1x Aft Spacer
Thin & thick washer/shims
SICArm LCA FRAME INSTALLATION STEPS:
**NOTES** The Goal of installation is to take up as much gap from frame mounting points and the control arm as possible before tightening down on the LCA thru bolt. Due to production changes, some cars may require adding shims and some may not.
STEP 1: Remove factory LCA & Sway Bar. Consult your service manual for instructions
STEP 2: Install the Anti-rotation spacer into the factory LCA bushing location.
If a gap is present, fit a thin or thick washer in with the anti rotation spacer. Most cars will not require a shim. Insert the lower control arm bolt to align the spacer to the thru hole in the frame - This will make the next step easier
STEP 3: Mount the LCA and insert the thru bolt through the frame 
Do not Insert the LCA bolt all the way through to the other control arm bushing until after step 4
STEP 4: Aft spacer installation
Insert the Aft Spacer between the rear LCA point on the frame and the lower control arm bushing. Insert the LCA bolt through the control arm bushing to aid in step 5
STEP 5: Shimming the AFT Spacer. THIS IS VERY IMPORTANT
Using one hand, Lift and push the LCA towards the rear of the car. Starting with the thick washer/shim, attempt to insert the washer/shim between the large face of the AFT spacer and the inner face of the control arm bushing as pictured. Insert as many washer/shims as possible until you can not fit another thin shim between the faces. Once the washer/shim stack is determined, pull the LCA bolt back enough to fully insert the washer/shim stack between the AFT spacer and control arm bushing. Then fully insert the LCA Bolt through the assembly. You can now install the washer and nut onto the LCA Bolt and LIGHTLY tighten the LCA bolt (20ft/lb or less) DO NOT SKIP THE LCA TIGHTENING PROCEDURE AND ANTI-ROTATION SPACER SETTING COVERED LATER IN THIS MANUAL
SICArm LCA SHOCK BOLT (COIL OVER) STEPS:
STEP 1: Check spacing between the lower shock bushing and the tabs.
Insert a washer/shim if needed. Shimming the shock tab is not nearly as critical, but should be done if there is a gap larger than the thick washer/shim. This tab was intentionally set larger in order to accommodate all the variances in aftermarket shocks.
STEP 2: Insert the shock bolt and tighten to 60-65ft/lb
SICArm LCA SHOCK BOLT (COIL SPRING) STEPS: (Pictures to be added soon)
Required tools: Spring compressor, Floor jack. (you should have both if you removed your stock suspension) (BE CAREFUL. COMPRESSED COILSPRINGS ARE DANGEROUS)
STEP 1: Using a spring compressor, Compress your coil spring and fit into the upper spring pocket in the frame. swing the LCA up and place the coil spring in the seat of the spring perch adapter. Be sure that the retention tab is sitting on the inside of the coil spring. You should not have to compress the coil spring nearly as much as with a stock LCA
STEP 2: Carefully place a floor jack under the ball joint boss of the control arm. Slowly jack the control arm up until the spring is well seated in the spring perch and the shock absorber can be installed
STEP 3: Insert the shock absorber into the LCA from the bottom and fully install, add a washer/shim if needed. Tighten the shock bolt to 60-65ft/lb. Once the shock absorber is fully installed (Top Bolts too) the coil spring is captured and the jack can be removed.
FINAL LCA FRAME MOUNTING STEPS (COILOVER & COIL SPRING) :
STEP 1: Install knuckle onto ball joint. Follow factory procedure and torques.
STEP 2: Reassemble any other suspension components removed.
STEP 3: Proceed to sway bar and sway bar link installation DO NOT SKIP THE LCA TIGHTENING PROCEDURE AND ANTI-ROTATION SPACER SETTING COVERED LATER IN THIS MANUAL
SICArm SWAYBAR AND LINK STEPS
STEP 1: Reusing your stock brackets and bushings, Install the SICArm swaybar onto your car, be sure that the ends of the sway bar sit ABOVE the tie rod as pictured

STEP 2: Using the hardware provided with the swaybar links, orient the swaybar link so the large face of the link bushing rests against the sway bar. Since the car is at full droop for install, you may have to push the link in to line up. See images for proper orientation
STEP 3: Tighten Link bolts to 30-35ft/lb. Check orientation below!

FINAL STEP: LCA TIGHTENING PROCEDURE AND ANTI-ROTATION SPACER SETTING
WITH THE CAR AT RIDE HEIGHT Tighten the LCA thru bolt to 70-75ft/lb. Once torqued take a 5/32 allen wrench and tighten down the set screws in the Anti-Rotation Spacer as tight as reasonably possible to set the spacer. Failure to do this can reduce bushing life and is necessary to lock the assembly to the frame of the car.
That's it! enjoy your new suspension!


